At the first meeting, we worked with the two small 3D printers, got a little introduction to
TinkerCad, a browser based 3D modeling app. We discussed the slicing of the model to convert into
G code for the printer, and we tinkered with LEDs, resistors, batteries, motors and experimenter boards.
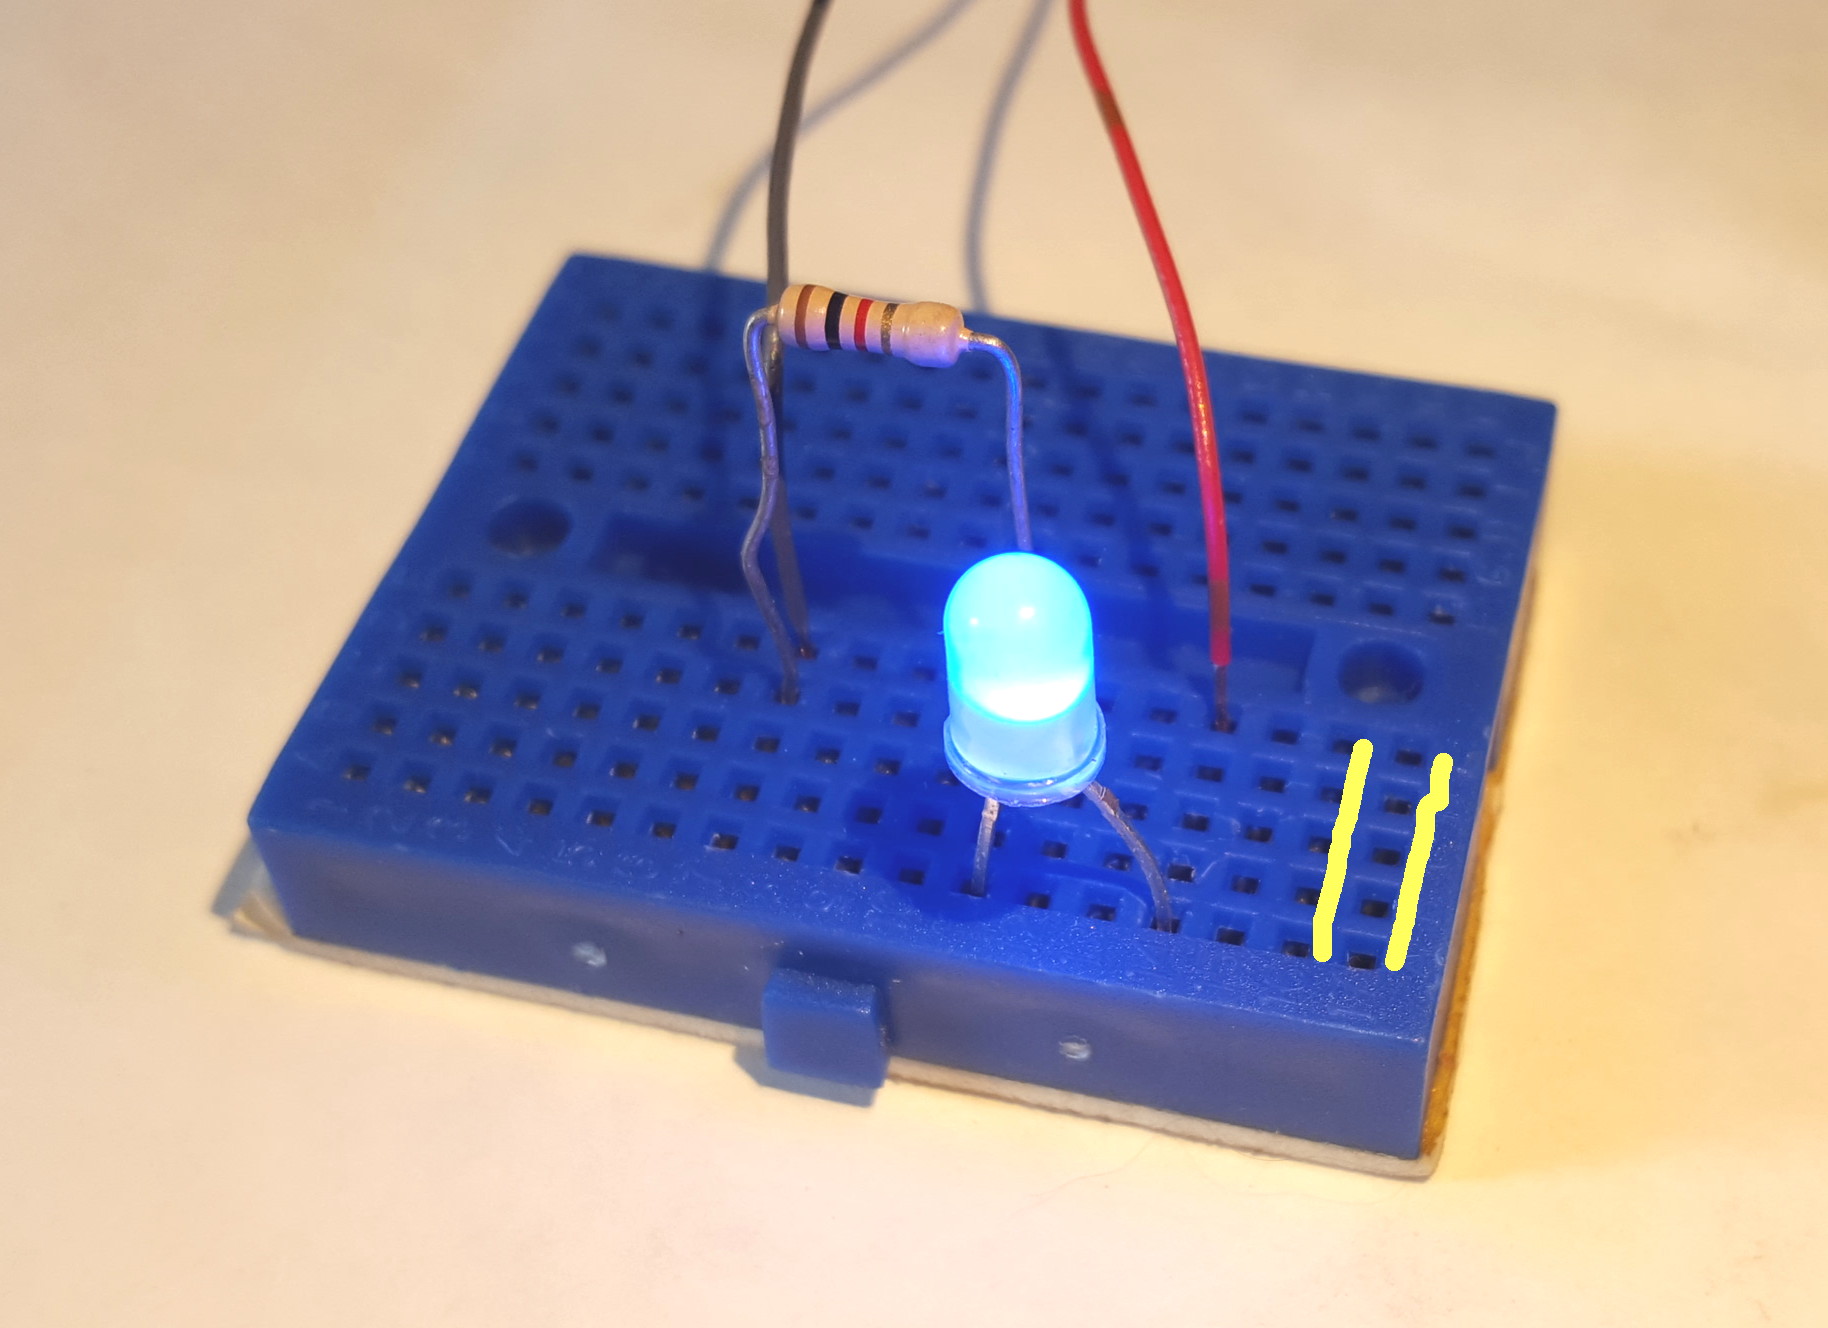
The two yellow lines show the direction the rows of holes connect.
A simple circuit.
An LED only works going in one direction, so if it does not light, turn it around.

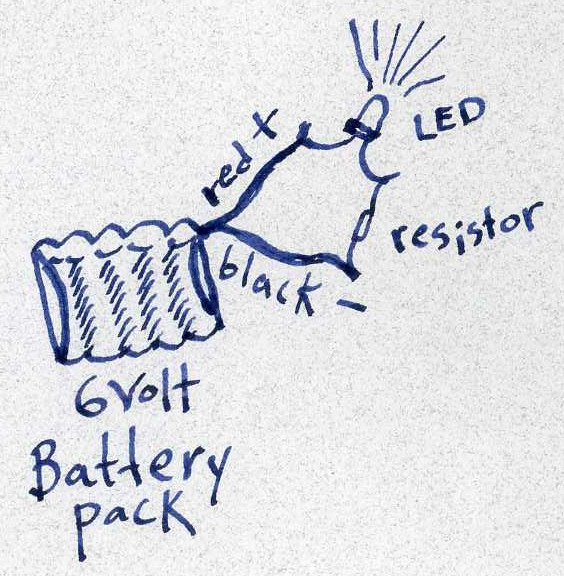
The same crcuit represented as a schematic. This shows how the electrical current flows in a loop.
If the loop is broken, or open, no current will flow, and the LED will not light.
The resistor keeps too much current from rushing through the LED and destroying it.
This has already been tested by one kid in the class. It is a rather pathetic little flash, and the LED is dead,
never to light again.
3D printing has 3 basic steps:
First you need a model.
You can either build it yourself or find it online.
TinkerCAD
Blender
Thingiverse
Then you export it as an stl file.
Once you have your stl file, your model needs to be converted into paths for the 3D printer to follow.
This is done with an app called a slicer. In the slicer, you can adjust the size of the model and adjust the settings
for quality of print, etc. The slicer saves the paths in a format called G code, which is what
the 3D printer actually understands. With the little printers we have at Fab Lab, we save the G code file on
a micro SD card and put that right into the printer.
Slicers for the little printers:
Cura
Repetier Host
There is some preparation necessary for a 3D printer.
First you plug in the power.
After it initializes, you navigate to prepare > auto home. This will move the print head to the position
x = 0, y = 0, z = 0 (home) the nozzle should be just barely floating above the surface of the build platform.
If not, adjustments will need to be made.
The plastic comes on a roll called filament. It is pushed into the heated nozzle by a motor.
To change filament colors, the nozzle should be hot (prepare > preheat PLA). You press the release lever at the feed motor and pull the filament out.
Then feed the new filament all the way into the nozzle.
To print, navigate to print from SD card and select your file!
When your print is finished, unclip the build plate and remove your print on the table.
This helps keep the build platform in adjustment.